One of things I wanted to do with this blog is tell my story with LEGO, and that means I get to choose where to start. And I'm going to start underwater.
I love the water, but I'm not a good swimmer. In calm, slow-moving water, I can flail my limbs around enough to keep my head above the water and slowly move in an intended direction until I get exhausted. Months of instruction at the YMCA a decade and a half ago did not significantly increase my proficiency, so PFDs are still my friends.
I were to try to plan a memorable, life-changing event like a marriage proposal, you might thing it would look something like this:
And you would be wrong. It looked more like this, only wetter:
I proposed to my wife underwater. Pretty cool, right? It was at Discovery Cove in Orlando, the "swim with the dolphins" day resort from the same people who run SeaWorld.
After just a couple months of dating, my wife and I knew we wanted to get married and we didn't want to wait long. There was shopping for a house, some rings, and a dress. We met each other's families. But I still needed to ask a very important question. When I proposed, it wouldn't be a surprise that it was happening. But I could still make it a surprise WHEN it happened.
My wife was travelling a lot for work, often with short notice, and this was a problem for me because I needed to plan. I couldn't plan a proposal if I didn't know where she was going to be. So when she had training scheduled in Orlando, I knew that was my chance. I would meet her there after class, and we would schedule an activity that couldn't be missed.
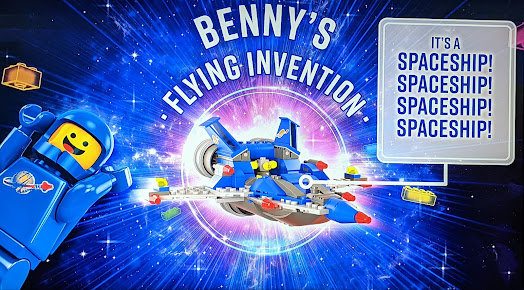
I definitely considered LEGOLAND.
Well, not that one. The one in Florida. We are both LEGO fans, and it was already very much established as part of our relationship, and everyone knew it. That was part of the problem. It was too obvious. We love LEGO, but also many other things. I actually moved the ring from a jewelry store box to a LEGO box so that it wouldn't attract any undue attention.
But space is cool.
astronaut by Lia Chan, rover by me
And Cape Canaveral isn't too far from Orlando. Turned out there was a rocket launch scheduled for the weekend. But launches can get cancelled or rescheduled, and this one was going to be in the evening. It the launch happened as planned, wouldn't I be able to take her attention away from it? Would she be annoyed for missing it? Would she even see the ring? Would I drop it in the dark? It would be fun to go, but I needed something else.
We like animals, including aquatic ones. And my wife used be SCUBA certified. Orlando isn't on the coast, but that hasn't stoped a theme part entrepreneur yet! So found about Discover Cove, and I learned they had engagement packages. I could choose to have a dolphin pop the question for me, or we could do it myself, underwater, while wearing giant tethered bubble helmets as part of their Sea Trek attraction. And the park would handle all the tricky logistics of hiding the ring until the appropriate moment when I was wearing a swimsuit and a bubble helmet.
When we got to the park, I surreptitiously transferred the expensive jewelry in the LEGO box to a park employee in the men's room. We went on to our cabana, snorkeled a bit, and then continued to our scheduled Sea Trek. It was arranged that I would be the last one in the water, and before climbing down the latter I asked the staff remaining above to confirm that everyone knew what was going to happen here. And I took the plunge.
The weighted helmet kept me planted on the ground through our guided tour of their artificial reef. There were lots of fish and manta rays. Staff pointed out various other aquatic critters along the path, and then picked up a horseshoe crab and handed it to my wife. With her distracted, they handed me a treasure chest.
the fish looked nothing like these.
I got down on one knee in the sand. The change in angle pushed the water line in the helmet momentarily up to my nose, but having attracted my wife's attention away from the crab I continued and opened the lid of the treasure chest where the critical question was written inside.
Alisa was surprised, and I avoided inhaling a fatal amount of water. Park staff conveniently offered her a laminated sign that said "Yes!". Interestingly, they had not prepared a "No" option. Fortunately, it was not required. You may have already guessed this because throughout the story, I have been calling her "my wife".
a nice little gazebo at Norfolk Botanical Garden where people get married (but not us)
And that brings us back to the idea of editing your LEGO story. A better writer may have left you hanging about how this was going to turn out. Or an editor might have given the writer that tip. I don't have an editor for this blog, but when it comes to LEGO, my wife is my editor.
As my LEGO editor, and my muse, and my sounding board, when I spin crazy LEGO ideas, my wife listens. She asks details and raises important issues I missed. When I'm going a little too far, she reels me back in. She helps me concentrate on the good parts of the idea. She keeps me from forgetting important details or being bogged down in the technical challenges. When I can't figure out how to build something, she'll suggest some good parts to use. She makes sure I don't take on challenges that are beyond the constraints we have to operate within. When I find a way around an obstacle she pointed out, she appreciates my success and keeps on editing from a new perspective, making the story better still.
We haven't really figured out how to build LEGO at the same time. We don't have the space or the time, and I can never get the bricks organized enough for her to work without stressing out. But we still do LEGO together, as a builder and an editor. And we make a great pair.


